
Holiday inspiration: A sweet DIY wreath
(BPT) - This holiday season, welcome friends and family to your home by adding a personal touch to your décor. This delicious twist on the traditional Christmas wreath will elevate your home’s first impression, setting a festive tone for all your seasonal celebrations. Indulge your DIY spirit with our easy to follow steps to create your own <a target="_blank" href="https://www.lindtusa.com/lindor/" rel="nofollow">LINDOR</a> Truffle Wreath.
<div style="max-width: 600px; width: 600px;"><img src="http://www.brandpointcontent.com/images/22937809.jpg" border="0" width="600" /></div>

<strong>MATERIALS:</strong>
* 12-20″ wire wreath frame
* Floral wire (or hot glue gun)
* Clippers
* Seasonal winter foliage (we used spruce, cedar, juniper and boxwood)
* Berries (we used pepper berries, but holly is nice too!)
* Red or gold ribbon
* <a href="http://www.lindtusa.com/shop/milk-chocolate-lindor-truffles-75-pc-bag" rel="nofollow">Lindt LINDOR Milk Chocolate Truffles</a>
<strong>Step One</strong>
<div style="max-width: 600px; width: 600px;"><img src="http://www.brandpointcontent.com/images/22937957.jpg" border="0" width="600" /></div>
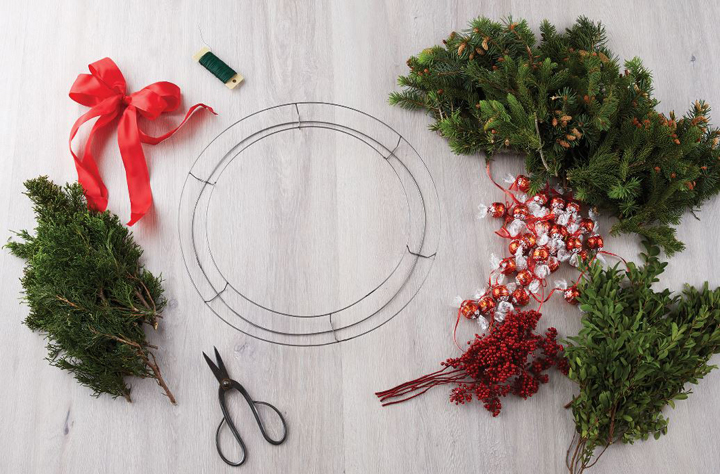
Gather all the materials and lay them out on a large, flat surface.
<strong>Step Two</strong>
<div style="max-width: 600px; width: 600px;"><img src="http://www.brandpointcontent.com/images/22937779.jpg" border="0" width="600" /></div>

Assemble the wreath by taking pieces of cut foliage and tying them with wire to the frame. Follow the natural curve of the branches.
<strong>Step Three</strong>
<div style="max-width: 600px; width: 600px;"><img src="http://www.brandpointcontent.com/images/22937600.jpg" border="0" width="600" /></div>

Continue layering pieces in the same direction, tying tightly. Exposed wire will get covered as you go.
<strong>Step Four</strong>
<div style="max-width: 600px; width: 600px;"><img src="http://www.brandpointcontent.com/images/22937493.jpg" border="0" width="600" /></div>

When you have come all the way around, simply tie wire ends tightly to one another. Cut wire and do a few extra twists to secure.
<strong>Step Five</strong>
<div style="max-width: 600px; width: 600px;"><img src="http://www.brandpointcontent.com/images/22937904.jpg" border="0" width="600" /></div>

Cover any visible wire by using small stems. Add your decorative elements.
<strong>Step Six</strong>
<div style="max-width: 600px; width: 600px;"><img src="http://www.brandpointcontent.com/images/22937671.jpg" border="0" width="600" /></div>

String the LINDOR truffles through the wreath and use wire or a glue gun to secure them in place. Add a bow and secure it with wire or a glue gun.
<strong>Step Seven</strong>
<div style="max-width: 600px; width: 600px;"><img src="http://www.brandpointcontent.com/images/22937101.jpg" border="0" width="600" /></div>

Step back and admire your work!
For more Holiday Inspiration visit <a target="_blank" href="http://www.lindtusa.com/blog" rel="nofollow">www.lindtusa.com/blog</a>
<img src="http://www.brandpointcontent.com/printsite/ImageWriter.ashx?memberid=724..." border="0" width="1" height="1" />